Meeting Security: Host Tools
This section details how to set the meeting controls to increase security in order to prevent disruptions of your meeting. This material is meant for use by Meeting Administrators. Meeting attendees without administrative privileges wil not be able to access the controls specified here.
Host Controls
When you start or join a meeting, the meeting controls toolbar will appear at the bottom of the meeting window. While hosts and participants have similar controls in a meeting, hosts have additional capabilities to manage the meeting.

The Host tools provide access to in-meeting security options such as locking the meeting, enabling the waiting room, hiding profile pictures, setting what participants can do, or suspending all participant activities.
STEP #1: Select the Host Tools icon to reveal the various control options
The Host Tools palette will be displayed as either a floating window or as a sidebar item of the main Zoom window:
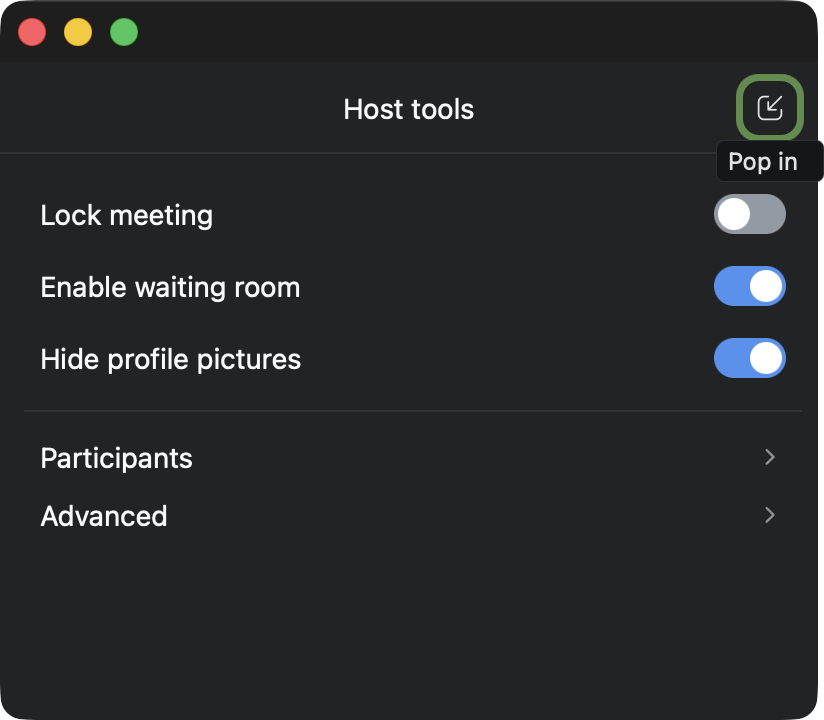
STEP #2: TURN ON the “Hide profile pictures” option
STEP #3: TURN ON the “Enable waiting room” option
STEP #4: Select the “Advanced” option
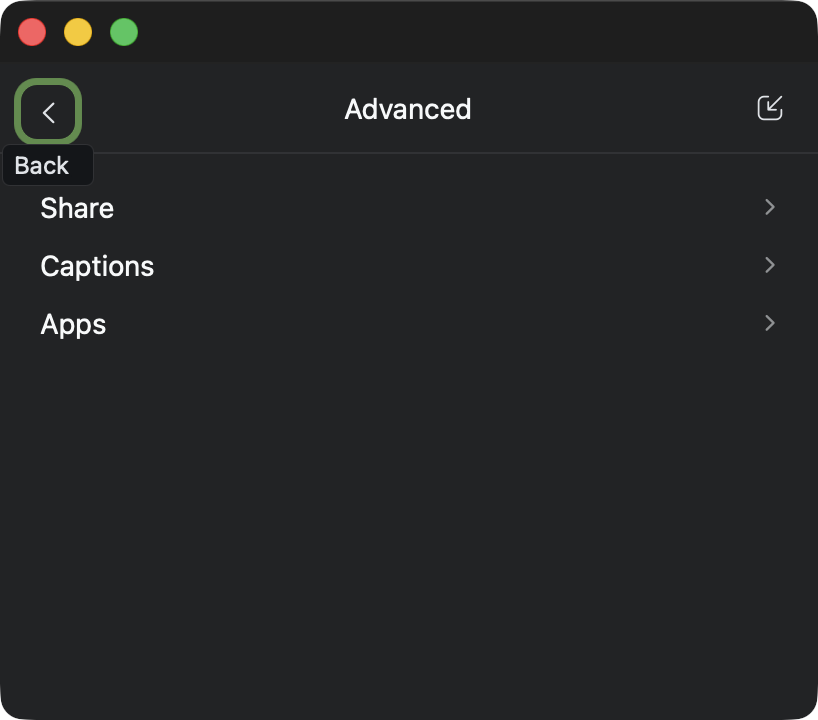
STEP #4: Select the “Apps” option
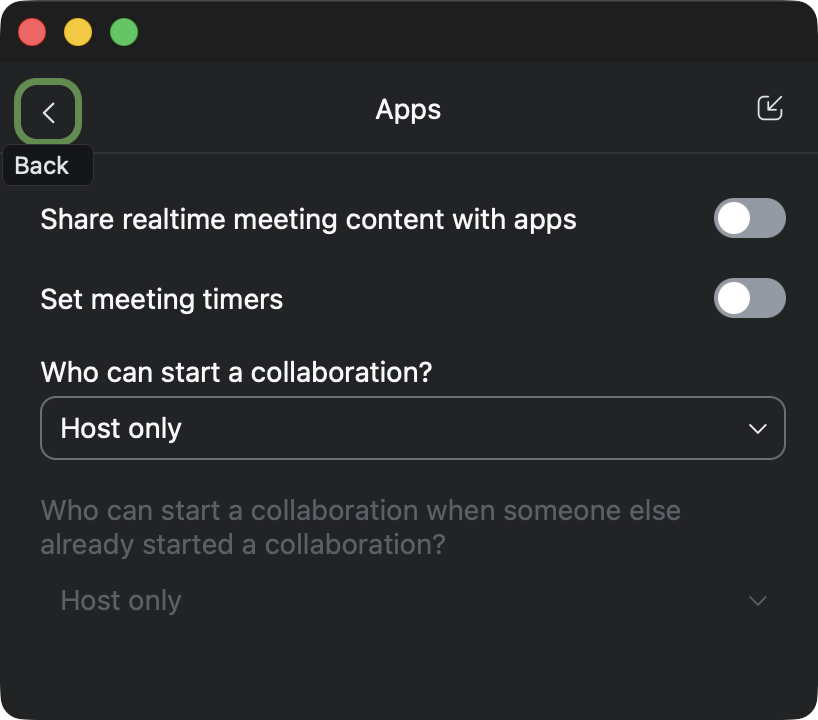
STEP #5: Disable the “Share realtine meeting content with apps” option
STEP #6: Disable the “Set meeting timers” option
STEP #7: Set the “Who can start a collaboration?” option to “Host only”
STEP #8: Select the Back button (top left)
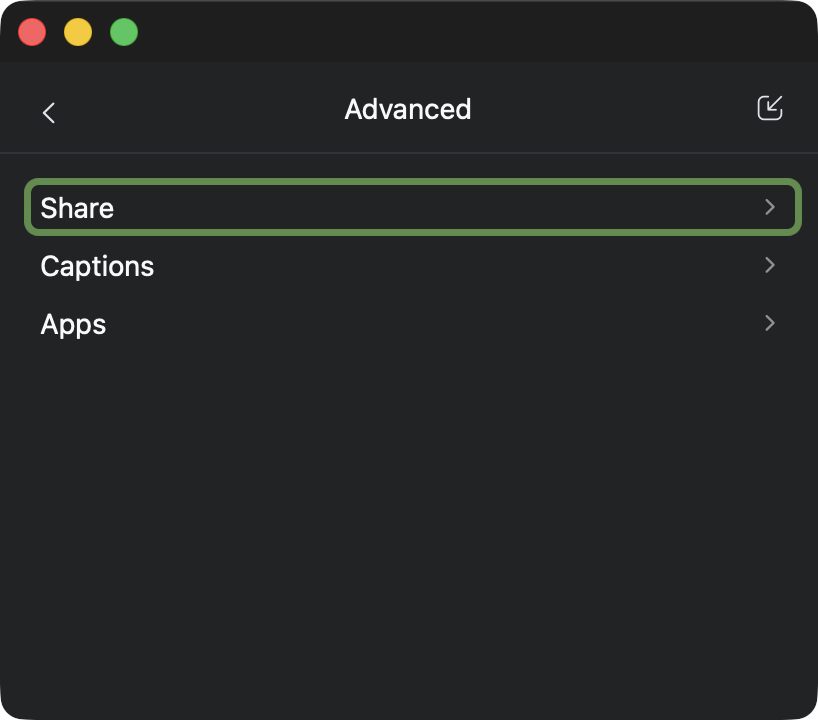
STEP #9: Select the “Share” option
STEP #10: Set the “Who can share?” option to “Host only”
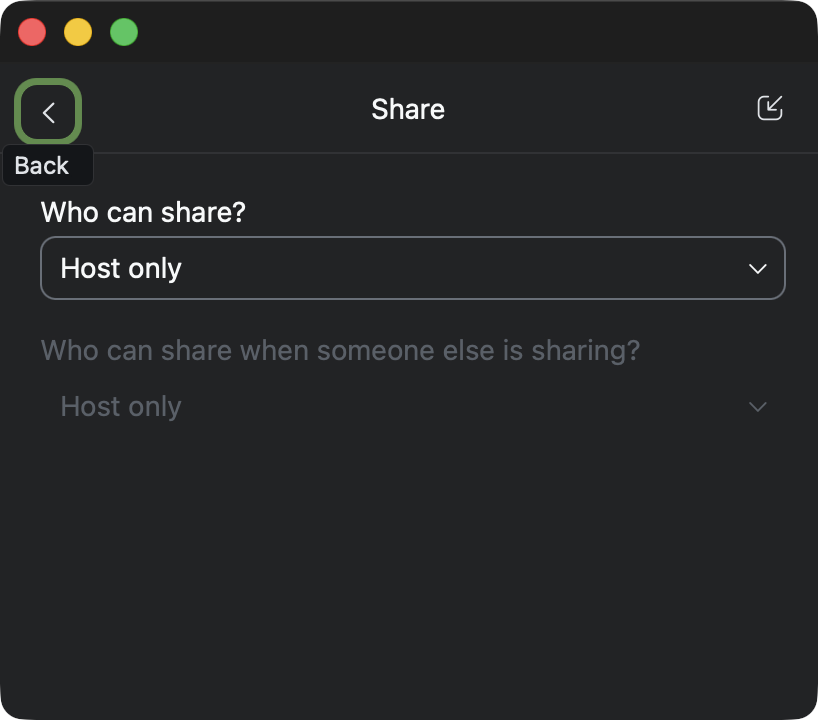
STEP #11: Select the Back button (top left)
STEP #12: Select the Back button again (top left)
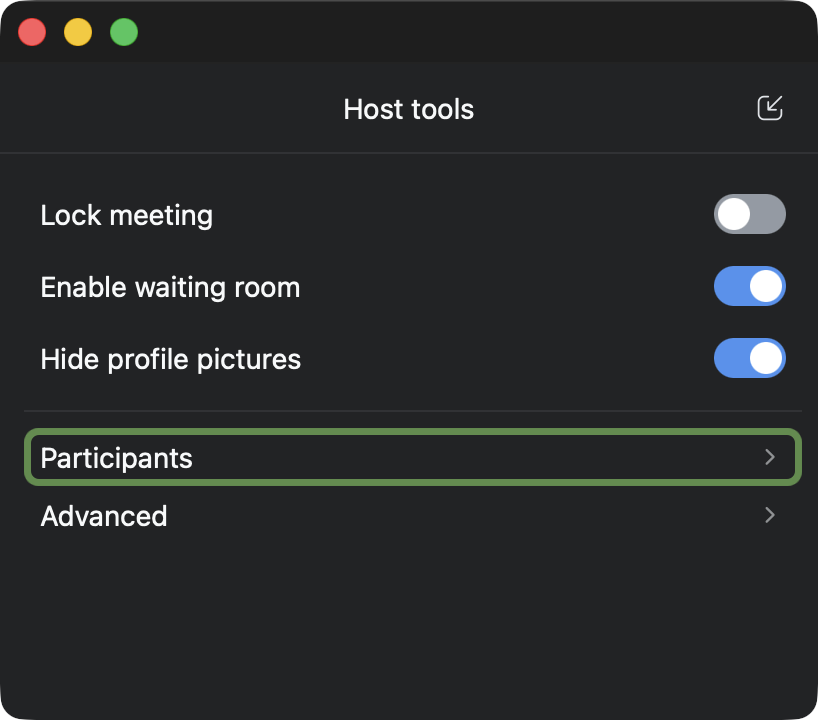
STEP #13: Select the “Participants” option
STEP #14: TURN OFF the “Rename themselves” option
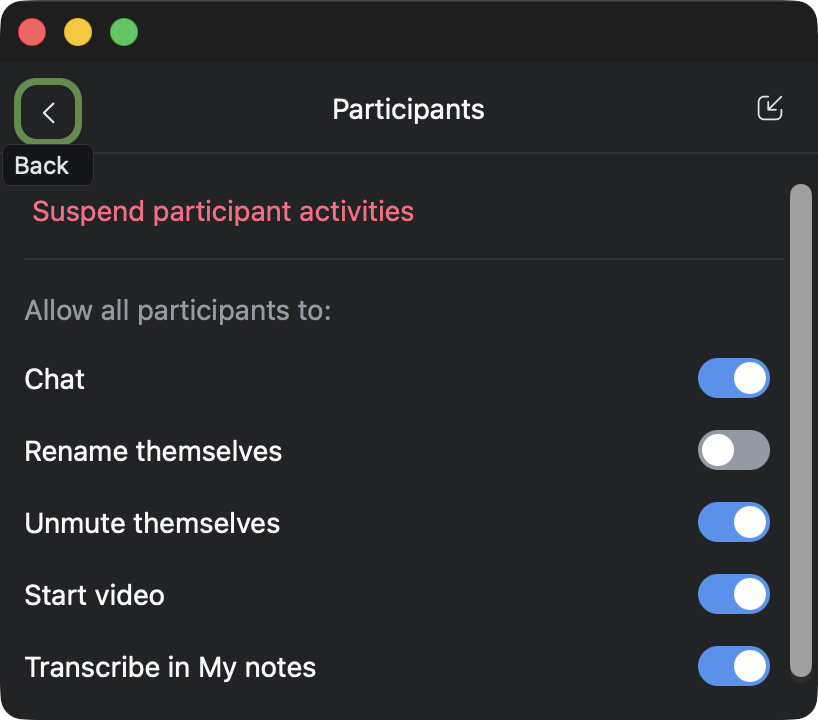
STEP #15: Select the Back button (top left)
STEP #16: Close the Host Tools palette
Results
Attendees will not be able to take over the video control of the screen nor rename themselves to avoid ejection from the meeting. THEY WILL STILL BE ABLE MAKE NOISE, but that is easy to mute and then eject them.